简介
QTextEdit是文本编辑器,支持富文本功能。接下来我们创建一个Qt Application 应用,然后在ui中添加一个QTextEdit插件。
运行程序后,可以在QTextEdit中输入任何文字也包括富文本。
文本块
我们在MainWindow的ui文件中添加了textedit插件,然后在MainWindow的构造函数中写代码,修改文本框样式
1 | MainWindow::MainWindow(QWidget *parent) : |
通过textEdit的document函数返回文本块,再通过rootFrame获取根框架,设置这个框架的边框样式为蓝色,边框为3.
运行程序后可以看到主窗口的textedit会显示一个蓝色边框的输入框,那就是根节点。我们可以插入两个纯文本
1 | MainWindow::MainWindow(QWidget *parent) : |
运行程序会看到插入的纯文本在根文本块里。我们可以再设置一个文本样式,然后插入到光标所在的位置,这样会生成一个新的文本框架,然后插入两行文字,这样会生成两个文本块
1 | QTextFrameFormat frameFormat; |
效果就是这样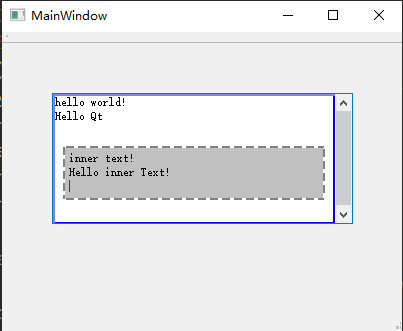
遍历文本块
我们可以遍历文本块和框架节点。先在构造函数中添加一个菜单,用来打印Frame和TextBlock
1 | QAction * action_frame = new QAction("Frame",this); |
然后实现showTextFrame
1 | void MainWindow::showTextFrame() |
程序输出
1 | cur node is text block ,text is "hello world!" |
如果只想打印文本块,我们可以用这种方式, 现在MainWindow的构造函数中添加一个显示文本的菜单项
1 | QAction* action_textBlock = new QAction(tr("文本块"),this); |
显示文本块的逻辑如下
1 | void MainWindow::showTextBlock() |
运行程序后点击文本块菜单,会输出如下
1 | "文本块0, 文本块首行行号0, 长度13, 内容%4" "hello world!" |
设置文本块样式
之前我们设置的都是文本框架的样式,这次我们设置文本块的样式.
在构造函数中添加字体菜单,用来设置文本块的字体样式
1 | QAction* action_font = new QAction(tr("字体"), this); |
setTextFont槽函数实现如下
1 | void MainWindow::setTextFont(bool checked) |
如果选中字体菜单,则设置插入新的文本块,文本块格式为宋体,加粗字样。如果取消选中,则插入新的文本块,设置为微软雅黑字体。
运行程序后, 选中字体菜单,然后再点击字体菜单取消选中,会插入不同字体的文本块,显示如下
插入表格列表图片
QTextEdit也支持插入表格,列表,图片等资源。在MainWindow的构造函数里增加列表,图片,表格的信号和槽函数连接逻辑
1 | QAction* action_textTable = new QAction(tr("表格"), this); |
然后实现这几个槽函数
1 | void MainWindow::insertTable() |
运行程序后,点击这几个菜单,会依次插入表格,列表,图片等。
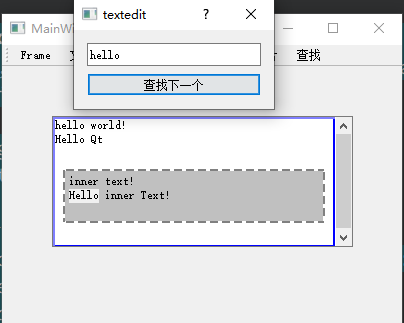
实现查找功能
在构造函数里添加查找信号和槽函数的连接
1 | QAction* action_textFind = new QAction(tr("查找"), this); |
在构造函数里连接了查找菜单和槽函数textFind。然后创建了一个对话框,对话框上有一个lineedit,以及查找按钮,每次点击这个按钮就执行查找下一个的功能。
运行后显示如下