MarkDown在线编辑器

项目简介

要求实现一个在线markdown编辑器,支持markdown文件的在线编辑,修改,重新加载,转化为html格式等。

Pandao MarkDown编辑器

Pandao MarkDown是基于BootStrap和jquery实现的MarkDown编辑器,已经支持MarkDown在线编辑功能,我们要做的是做一个demo把Pando MarkDown的功能调用起来,形成一整套的发布,编辑,修改等流程。
Pandao MarkDown 的官网https://pandao.github.io/editor.md/
Pandao MarkDown 的项目地址https://github.com/pandao/editor.md

发布页面

实现发布页面publish.html,这个页面不做过多粘贴,只截取一小部分作示例,详细的文件在这里https://cdn.llfc.club/publish.html

1
2
3
4
5
6
7
8
9
10
11
12
13
14
15
16
17
18
<link rel="stylesheet" href="editormd/css/editormd.css" />
<div id="test-editor">
<textarea style="display:none;">### 关于 Editor.md

**Editor.md** 是一款开源的、可嵌入的 Markdown 在线编辑器(组件),基于 CodeMirror、jQuery 和 Marked 构建。
</textarea>
</div>
<script src="https://cdn.bootcss.com/jquery/1.11.3/jquery.min.js"></script>
<script src="editormd/editormd.min.js"></script>
<script type="text/javascript">
$(function() {
var editor = editormd("test-editor", {
// width : "100%",
// height : "100%",
path : "editormd/lib/"
});
});
</script>

为id为test-editor的div生成了markdown编辑器,我们可以看一下效果
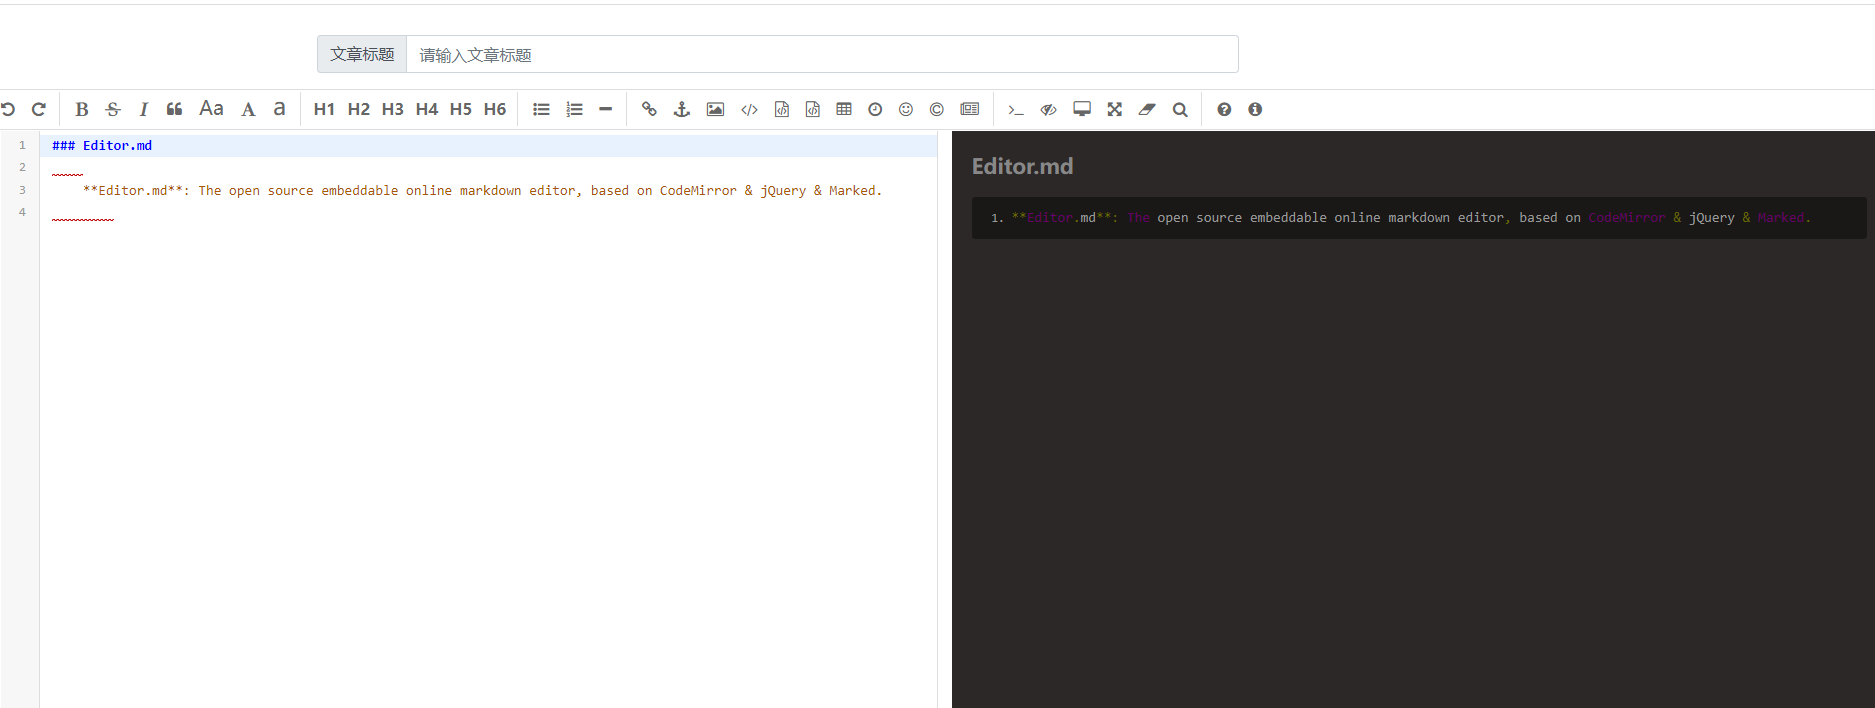
https://cdn.llfc.club/1668079260340.jpg

markdown转化为html

将markdown转化为html,需要使用markdownToHTML函数,这个函数需要传入一个节点用来接收转化生成的html。
在publish.html中再添加一个按钮用来发布文章,和一个id为”test-markdown-view”的div用来接收生成的html

1
2
3
4
5
6
7
8
9
10
11
12
13
14
15
16
<div class="container-fluid" id="article-publish">
<div class="row">
<div class="col publish-btn-parent">
<button type="button" class="btn btn-primary" id="publish-post-btn">发布文章</button>
<button type="button" class="btn btn-primary" id="return-index-btn">返回列表</button>
</div>
</div>
<div class="row">
<div class="col">
<div id="test-markdown-view" class="">
<!-- Server-side output Markdown text -->
<textarea style="display:none;">### Hello world!</textarea>
</div>
</div>
</div>
</div>

接下来实现markdown转化为html的逻辑

1
2
3
4
5
6
7
8
9
10
11
12
13
14
15
16
17
18
19
20
21
22
23
24
25
26
27
28
29
30
31
32
33
34
35
36
37
//获取md内容转化为html
var testView = editormd.markdownToHTML("test-markdown-view", {
markdown: $("textarea.editormd-markdown-textarea").text(),
});

//组装json发送给服务器
let post_data = {
"md-content": $("textarea.editormd-markdown-textarea").text(),
"html-content": $("#test-markdown-view").prop("outerHTML"),
"title": title,
}

$.ajax({
type: "post",
contentType: "application/json;charset=utf-8",
data: JSON.stringify(post_data),
url: "/publish-article",
dataType: "json",
async: false,
success: function (data) {
if (data.errorcode != 0) {
alert(`request error , code is ${data.errorcode}`)
return;
}

window.location.href = '/'
},

error: function (XMLHttpRequest, textStatus, errorThrown) {
// 状态码
console.log(XMLHttpRequest.status);
// 状态
console.log(XMLHttpRequest.readyState);
// 错误信息
console.log(textStatus);
}
});

将md转化为html放在了id为”test-markdown-view”的div下,然后组装post_data,将markdown和html内容都发送给了服务器,服务器存储起来,方便下次修改时读取。

显示文章

因为服务器已经存储了html和markdown内容,接下来显示文章只需要读取html就可以了
先实现一个获取文章内容的函数

1
2
3
4
5
6
7
8
9
10
11
12
13
14
15
16
17
18
19
20
21
22
23
24
25
26
27
28
29
30
31
32
33
34
35
36
//请求单个文章的详情
function GetArticleDetail(article_id) {
let post_data = { 'article_id': article_id }
$.ajax(
{
type: "post",
contentType: "application/json;charset=utf-8",
data: JSON.stringify(post_data),
url: "/article-detail",
dataType: "json",
async: false,
success: function (data) {
if (data.errorcode != 0) {
alert(`request error , code is ${data.errorcode}`)
return;
}
console.log("get article deatail is ", data)
//编译模板的里的内容
var template = Handlebars.compile($('#template-article-info').html());
//把后台获取到的数据student渲染到页面
$('#article-info-div').html(template(data['article-detail']));
$('#article-title-div>h1').html(data['article-detail'].title);
$('.article-div').html(data['article-detail']['html-content'])
},

error: function (XMLHttpRequest, textStatus, errorThrown) {
// 状态码
console.log(XMLHttpRequest.status);
// 状态
console.log(XMLHttpRequest.readyState);
// 错误信息
console.log(textStatus);
}
}
)
}

在函数GetArticleDetail里我们将服务器传过来的数据通过模板编译显示在html里,并且获取了”html-content”放在$(‘.article-div’)节点下。
服务器的逻辑就不赘述了,可以见文章底部的源码链接。
文章页面article.html简要列举一段

1
2
3
4
5
6
7
8
9
10
11
12
13
14
15
16
17
18
19
20
21
22
23
24
25
26
<div class="row">
<div class="col" id="article-info-div">
<script type="text/x-handlebars-template" id="template-article-info">
<div class="row ">
<div class="col article-div" id={{artid}} data-created={{created}} data-title={{title}}>
</div>
</div>
</script>
</div>
</div>

<script src="/static/js/jquery.min.js"></script>
<script src="/static/js/handlebars.js"></script>
<script src="/static/js/index.js"></script>
<script>
$(function () {
var pathnames = window.location.pathname.split('/')
if (pathnames.length < 3) {
console.log("invalid url")
return;
}

var article_id = pathnames[2]
GetArticleDetail(article_id)
});
</script>

所以实现过后文章页面的效果大体是这个样子
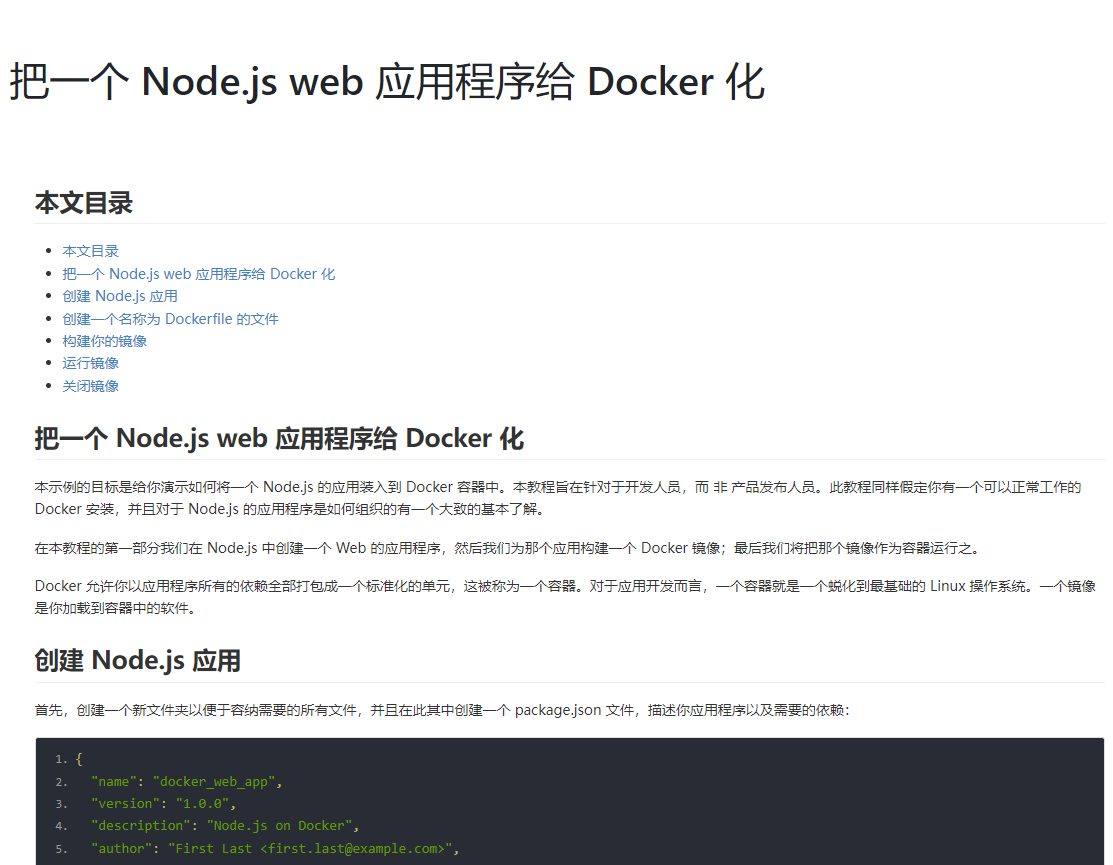
https://cdn.llfc.club/1668081722889.jpg

再次编辑

对于已经发布的文章,有时候需要再次编辑,这个时候可以通过前端向服务器发送请求获取存储的markdown,编辑markdown之后生成新的html,再次发送给服务器,以达到更新文章的目的.
简单列举一下edit.html的内容

1
2
3
4
5
6
7
8
9
10
11
12
13
14
15
16
17
18
19
20
21
22
23
24
25
26
27
<div class="container-fluid">
<div class="row">
<div id="test-editor" class="col">
<textarea style="display:none;">### Editor.md

**Editor.md**: The open source embeddable online markdown editor, based on CodeMirror & jQuery & Marked.
</textarea>
</div>
</div>
</div>

<div class="container-fluid" id="article-publish">
<div class="row">
<div class="col publish-btn-parent">
<button type="button" class="btn btn-primary" id="publish-edit-btn">更新文章</button>
<button type="button" class="btn btn-primary" id="return-index-btn">返回列表</button>
</div>
</div>
<div class="row">
<div class="col">
<div id="test-markdown-view" class="">
<!-- Server-side output Markdown text -->
<textarea style="display:none;">### Hello world!</textarea>
</div>
</div>
</div>
</div>

和public.html类似,edit.html也包含更新按钮以及id为“test-editor”的div,该div用来存储markdown内容。
id为”test-markdown-view”的div用来存储markdown转化的html内容。
我们在页面里生成editor编辑器,并且从服务器获取markdown内容写入id为”test-editor”的div里

1
2
3
4
5
6
7
8
9
10
11
12
13
14
15
16
17
18
19
20
21
22
23
24
25
26
27
28
29
30
31
32
<script>


$(function () {
var editor = editormd("test-editor", {
height: '800px',
syncScrolling: "single",
emoji: true,
//启动本地图片上传功能
imageUpload: true,
watch: true,
imageFormats: ["jpg", "jpeg", "gif", "png", "bmp", "webp", "zip", "rar"],
path: "./editormd/lib/",
imageUploadURL: "./upload.php", //文件提交请求路径
saveHTMLToTextarea: true, //注意3:这个配置,方便post提交表单
previewTheme: "dark",//预览主题样式 默认白色 dark为黑色
});
})
</script>
<script>
$(function () {
var pathnames = window.location.pathname.split('/')
if (pathnames.length < 3) {
console.log("invalid url")
return;
}

var article_id = pathnames[2]
GetArticleEdit(article_id)
// console.log('window.location.pathname is ', window.location.pathname.split('/'))
});
</script>

GetArticleEdit 这个函数用来从服务器获取markdown数据拼接到div上

1
2
3
4
5
6
7
8
9
10
11
12
13
14
15
16
17
18
19
20
21
22
23
24
25
26
27
28
29
30
31
32
33
//请求单个文章编辑页面内容
function GetArticleEdit(article_id) {
let post_data = { 'article_id': article_id }
$.ajax(
{
type: "post",
contentType: "application/json;charset=utf-8",
data: JSON.stringify(post_data),
url: "/article-detail",
dataType: "json",
async: false,
success: function (data) {
if (data.errorcode != 0) {
alert(`request error , code is ${data.errorcode}`)
return;
}
console.log("get article deatail is ", data)
$("textarea.editormd-markdown-textarea").text(data['article-detail']['md-content'])
$("#title-input").val(data['article-detail']['title'])
$("#title-input").attr('data-artid', data['article-detail']['artid'])
},

error: function (XMLHttpRequest, textStatus, errorThrown) {
// 状态码
console.log(XMLHttpRequest.status);
// 状态
console.log(XMLHttpRequest.readyState);
// 错误信息
console.log(textStatus);
}
}
)
}

所以通过这些逻辑我们实现了编辑功能,进入编辑页面后自动将服务器存储的markdown内容加载到页面上,编辑页面基本是这个样子
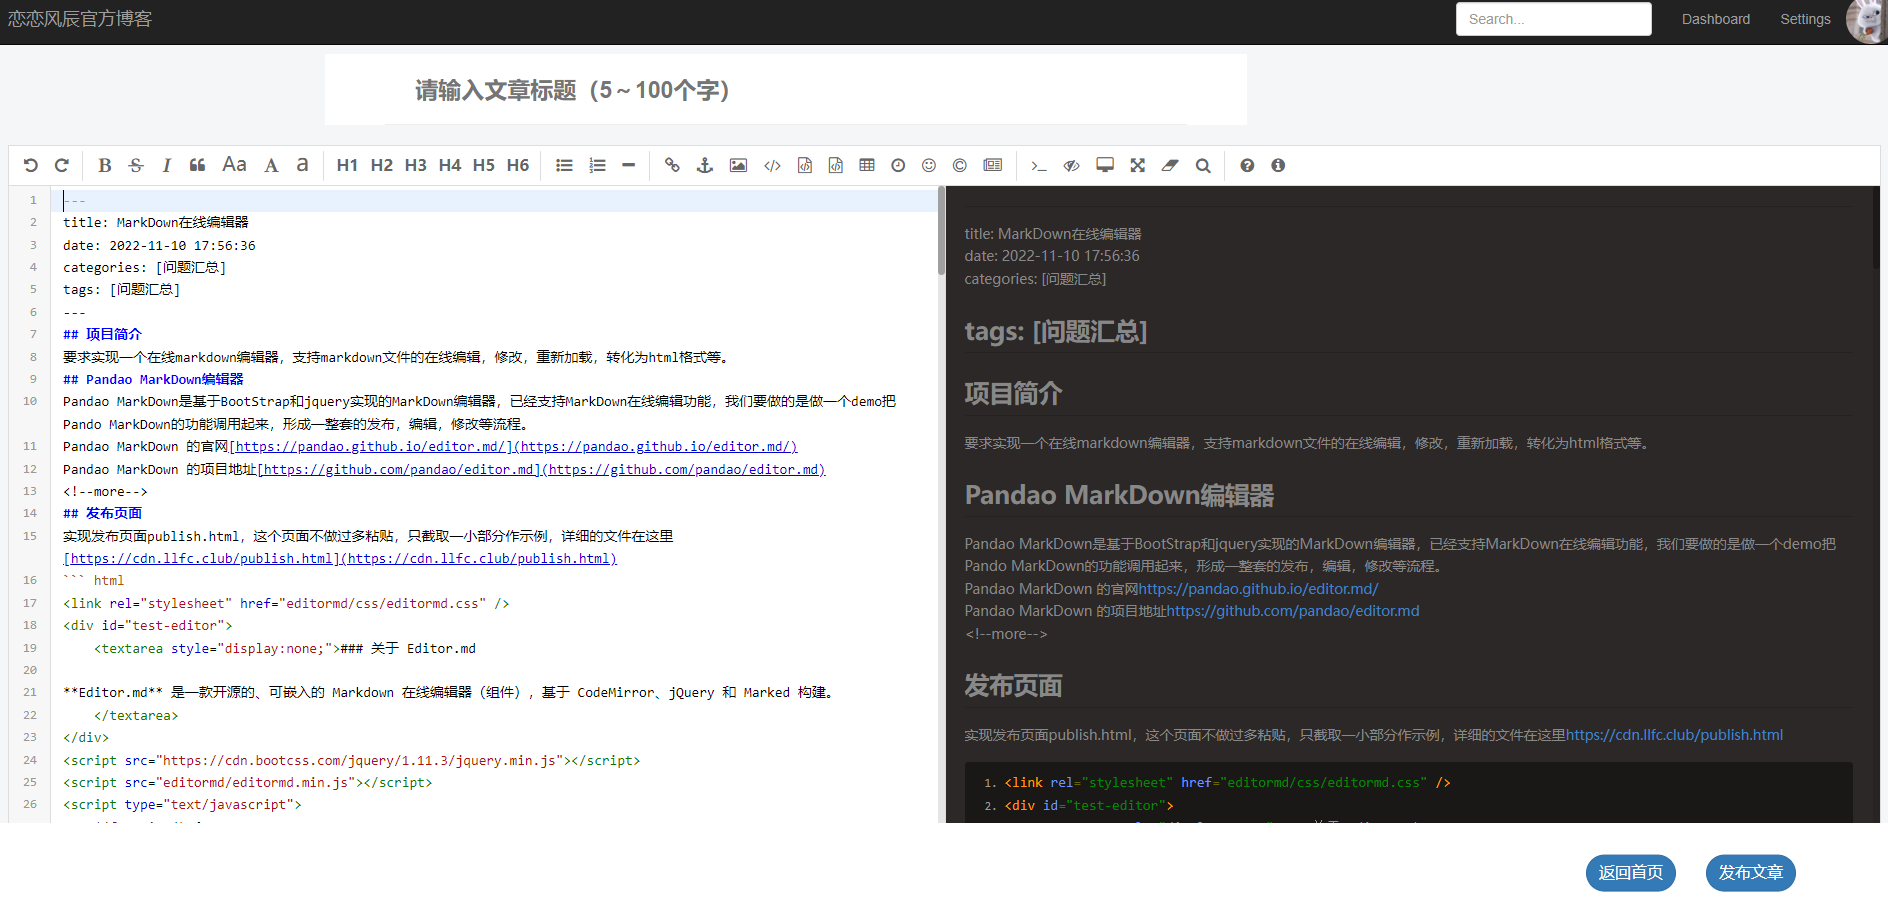
https://cdn.llfc.club/1668129289749.jpg
这样就实现了在线编辑,重新发布的功能。

总结

整体来看,通过我们的重组和架构可以实现markdown文档的在线编辑和发布。
感兴趣的可以看看我的源码,源码地址如下
https://gitee.com/secondtonone1/pandaomd-pro
原文链接
https://llfc.club/articlepage?id=2HNduA4HWE8iMt06GH4uUi2cWLy