简介
前问提到了PicAnimationWid,PicButton,PreListWid等类,这里介绍如何实现这些类,并串联起来达到幻灯片放映的效果。
SlideShowDlg
在左侧目录树右击时弹出菜单,新增幻灯片播放的选项,点击后会弹出SlideShowDlg。SlideShowDlg的构造函数如下
1 | SlideShowDlg::SlideShowDlg(QWidget *parent, QTreeWidgetItem *first_item, |
_first_item表示播放的第一个item
_last_item表示播放的最后一个item
先将slideshow展示出来看看效果,所以在ProTreeWidget的构造函数里添加动作
1 | _action_slideshow = new QAction(QIcon(":/icon/slideshow.png"), tr("轮播图播放"),this); |
在点击槽函数里完善右键点击逻辑
1 | void ProTreeWidget::SlotItemPressed(QTreeWidgetItem *pressedItem, int column) |
实现槽函数SlotSlideShow,n内部创建一个SlideShowDlg智能指针对象,然后设置为模态对话框,并且最大化显示。
1 | void ProTreeWidget::SlotSlideShow(){ |
SlotSlideShow里根据right_pro_item获取当前项目下第一个子item和最后一个子item,这个算法并不复杂,right_pro_item为项目的root item,所以可以递归的获取root下第一个非文件夹item节点和最后一个非文件夹item节点。
遍历根目录所有一级子节点,如果第一个一级子节点为文件夹则递归查找,直到找到,如果第一个一级子节点下不存在图片类型的item,那么
1 | ProTreeItem *ProTreeItem::GetFirstPicChild() |
获取最后一个子节点逻辑类似
1 | ProTreeItem *ProTreeItem::GetLastPicChild() |
此时点击幻灯片播放菜单就会弹出这个对话框了,为了样式美观我们添加qss样式
1 | SlideShowDlg { |
PicAnimationWid
接下来我们需要在SlideShowDlg的动画区域添加动画逻辑,类PicAnimationWid为图片动画展示窗口,继承于QWidget,构造函数比较简单
1 | PicAnimationWid::PicAnimationWid(QWidget *parent) : QWidget(parent),_factor(0.0), |
- _factor为动画因子,控制图片渐隐效果
- _b_start控制动画是否播放
- _cur_item 表示当前要绘制显示的ProTreeItem对象。
- 启动了一个定时器,然后定时回调TimeOut函数
同样的道理析构函数需要实现定时器的停止定时器回调函数1
2
3
4PicAnimationWid::~PicAnimationWid(){
_timer->stop();
// delete _timer;
}该函数每次对factor增加0.01,进而控制动画,如果factor变为1说明已经完成一张图片的消失和另一张的展示,需要更新下一组两张图片用来做渐隐渐现的效果。1
2
3
4
5
6
7
8
9
10
11
12
13
14
15
16
17
18
19
20
21
22
23
24
25
26void PicAnimationWid::TimeOut()
{
if(!_cur_item){
Stop();
update();
return;
}
//qDebug()<<"_factor is " << _factor << endl;
_factor = _factor+0.01;
if(_factor >= 1){
_factor = 0;
auto * cur_pro_item = dynamic_cast<ProTreeItem*>(_cur_item);
auto * next_pro_item = cur_pro_item->GetNextItem();
if(!next_pro_item){
Stop();
update();
return;
}
SetPixmap(next_pro_item);
update();
return;
}
update();
}
update函数是基类的刷新函数,会触发paintEvent函数,这个函数功能之后介绍。先介绍SetPixmap函数,该函数用来加载两张图片做渐变效果。
实现SetPixmap设置要绘制的图片因为要双缓冲绘图,所以要缓存两张图片,用_pixmap1和_pixmap2缓存。1
2
3
4
5
6
7
8
9
10
11
12
13
14
15
16
17
18
19
20
21
22
23
24
25
26
27
28
29
30void PicAnimationWid::SetPixmap(QTreeWidgetItem *item)
{
if(!item){
return;
}
auto * tree_item = dynamic_cast<ProTreeItem*>(item);
auto path = tree_item->GetPath();
_pixmap1.load(path);
_cur_item = tree_item;
if(_map_items.find(path) == _map_items.end()){
_map_items[path]=tree_item;
qDebug() << "SetPixmap path is " << path << endl;
emit SigUpPreList(item);
}
emit SigSelectItem(item);
auto * next_item = tree_item->GetNextItem();
if(!next_item){
return;
}
auto next_path = next_item->GetPath();
_pixmap2.load(next_path);
if(_map_items.find(next_path) == _map_items.end()){
_map_items[next_path] = next_item;
emit SigUpPreList(next_item);
}
}
实现_pixmap1渐隐,_pixmap2渐现。
SigUpPreList信号是用来通知下方预览框更新预览图,因为我们要做的是上方播放动画后,下方会更新预览图。
当前正在播放的图在下方预览图有选中提示,所以SigSelectItem信号是用来通知下方预览图选中效果。
接下来要实现开始函数,让动画动起来1
2
3
4
5
6
7
8void PicAnimationWid::Start()
{
emit SigStart();
emit SigStartMusic();
_factor = 0;
_timer->start(25);
_b_start = true;
} - SigStart信号用来通知右上方按钮的显示播放还是暂停状态,之后在处理信号连接问题。
- _factor为动画因子
- _b_start被设置为true
- 定时器每隔25ms更新一次
- SigStartMusic信号用来更新音乐,之后再处理信号连接问题。
同样实现一个停止动画的逻辑
1 | void PicAnimationWid::Stop() |
我们接下来要实现双缓冲绘图的逻辑
1 | void PicAnimationWid::paintEvent(QPaintEvent *event) |
所谓双缓冲绘图逻辑如下:
- 提前加载好图片的两个pixmap分别为_pixmap1和_pixmap2。然后基于现在的widget大小做等比拉伸。
- 创建两个pixmap用作遮盖,分别为alphaPixmap和alphaPixmap2,将他们填充为透明的颜色。
- 分别创建两个画刷,然后绑定alphaPixmap和alphaPixmap2,用画刷分别绘制_pixmap1和_pixmap2。
- CompositionMode_DestinationIn表示遮罩的模式为显示重叠区域,CompositionMode_Source表示原图的绘制模式。
- 最后根据alpha值分别p2和p1的两个矩形区域设置透明度。
- 最后统一用一个painter分别绘制两个alphaPixmap和alphaPixmap2。
我们回到SlideShowDlg的ui文件,将动画显示区的widget升级为PicAnimationWid类即可。
然后在其构造函数里添加对动画区域的调用
1 | ui->picAnimation->SetPixmap(_first_item); |
然后我们运行程序右键目录树的root项目选择幻灯片播放就可以看到动画效果了。
预览图类PreListWid
PreListWid类是从QListWidget派生而来。我们将SlideShowDlg中的preListWidget升级为PreListWid类型。
然后在ui文件中设置其高度为固定的110,因为之前我们设置其父窗口widget高度为固定的120,之后再设置其最大宽度为1677215,一个很大的数,列表不换行。
属性配置如下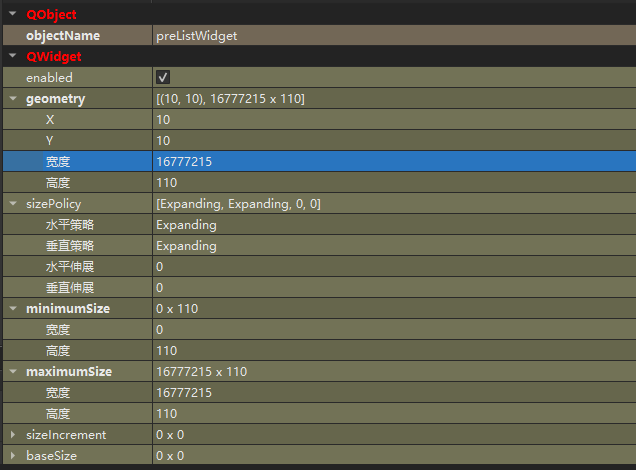
构造函数
1 | PreListWid::PreListWid(QWidget *parent):QListWidget(parent),_global(0),_last_index(17) |
- 构造函数里设置视图模式为图片模式
- _global为计数器,统计累计加入列表的item数量,为每个item生成计数id。
- _last_index为上一次选择的item的id,因为全屏模式下列表框最多显示17个item,那么初始为17。该变量主要用于控制PreListWid是否横向移动,以及移动多少像素,因为上方展示的图片在下方的预览图可能在屏幕外,所以要移动PreListWid做显示效果。
- 连接了PreListWid的itemPressed信号,所以当item被点击后会触发SlotItemPressed函数。
PreListItem
为了实现我们自己的功能,所以PreListWid的item要自己实现,PreListItem继承于QListWidgetItem类。
其基本功能包括
1 | PreListItem::PreListItem(const QIcon &icon, const QString &text,const int &index, |
_path表示item代表的文件路径
_index表示item的索引,也就是之前提到的id
动画区域和预览区域联动
为使动画区域和预览区域联动,在SlideShowDlg的构造函数里添加信号和槽函数连接逻辑
1 | auto * prelistWid = dynamic_cast<PreListWid*>(ui->preListWidget); |
- 连接了PicAnimationWid的SigUpPreList信号,可以实现上面动画播放时将图像的预览图添加到列表中的效果。
- 连接了PicAnimationWid的SigSelectItem信号,可以实现上面动画播放时根据图像显示预览图选中效果。
- 连接了PreListWid的SigUpSelectShow信号,可以实现点击下方预览图,上方显示对应的动画效果。
先实现添加逻辑
1 | void PreListWid::SlotUpPreList(QTreeWidgetItem *tree_item) |
根据传入的tree_item判断路径是否存在,如果存在则返回,不存在则调用AddListItem将item加入listwidget里。
1 | void PreListWid::AddListItem(const QString &path) |
- 因为图片的大小宽高不同,做拉伸时产生的空白区域不一样,那么我们统一用宽高为PREICON_SIZE的正方形绘制然后填充默认的背景色作为dist_pixmap。
- 然后用一个painter绑定这个dist_pixmap,计算和原图形src_pixmap的差值,让原图形src_pixmap居中绘制在dist_pixmap上。
- 然后构造PreListItem对象,将路径放入集合中。
- 如果_global为1说明时第一张预览图,需要记录一下预览图在其父窗口的位置,这样我们可以根据屏幕最右侧的预览图和该图的位置差值移动PreList
Wid。
更新预览图选中效果
1 | void PreListWid::SlotUpSelect(QTreeWidgetItem *tree_item) |
判断当前播放的图像对应预览图的item的索引是否大于17,如果大于17说明该item在屏幕外,因为一个屏幕最多容纳17个item,所以要移动PreListWid。
移动的方法就是当前索引减去上一次的索引差值乘以100,因为一个item的宽度为100,纵坐标不变。同时设置当前item为选中状态。
点击预览图显示对应图片
PreListWid响应点击的槽函数
1 | void PreListWid::SlotItemPressed(QListWidgetItem *item) |
点击item时发送SigUpSelectShow信号通知动画去显示选择的图片。
触发PicAnimationWid的槽函数SlotUpSelectShow
1 | void PicAnimationWid::SlotUpSelectShow(QString path) |
内部调用UpSelectPixmap更新图片为选中的图片,并且调用update刷新界面。
1 | void PicAnimationWid::UpSelectPixmap(QTreeWidgetItem *item) |
到此就实现了幻灯片放映和下方预览图的交互效果。播放和暂停,以及切换操作等留给下一篇。